Home          Appliance Repair          Appliance Parts          Used Appliances          Blog          Contact         

Wednesday, October 28, 2015

Tips to Help the Dishwasher Run Better (part 2)

If you're lucky enough to have some mechanical help with your dishes, how's your helper doing these days? Cooking can be tough on the dishwasher. All those goopy soups, milk-crusted mugs, and baked-on casseroles can overload it; perhaps you're feeling like things aren't running so smoothly or smelling as good as they ought to in there.

Well, we're here to help, with 5 more tips for making your dishwasher run its best.

Are these tips familiar to you? I was already doing several of them, but a few were new, so I thought they might be to you as well.


6. Run an empty dishwasher with vinegar

It’s the same concept as running a vinegar load in your washing machine. You simply toss a cup of white vinegar into the bottom of an empty dishwasher and run a normal cycle. It cleans out old food particles to keep your dishwasher smelling fresh.


7. Clean the dishwasher trap

Down in no-man's land, under the lower sprayer, there's usually a piece that is removable. Under it you'll usually find bits of food that didn't make it out the drain or even pet hair (eww) if you have a fur-ball of any kind running around your home. Sometimes the tray comes out fully so it can be rinsed in the sink; sometimes a towel is needed to remove the gunk buildup.


8. Clean the dishwasher seals

After a few months of use, your dishwasher accumulates a little bit of ick and stick around the rubber gasket in the door and often around the soap door as well. Make sure to give them a once-over with a damp towel to keep the grime down.


9. Check your water heater's temperature

There's a joke about where to put the thermometer, but we'll pass this time around. Make sure your water heater is set between 120 and 125 degrees. Many units are shipped new set to a much lower heat. This is the ideal temperature for washing dishes; don't be tempted to turn it higher or else it will cause water to flash dry and not roll off your dishes, taking the ends of the dirty bits with it.


10. Test your water

Hard water is killer on dishes and your ability to really get things clean. Make sure to have things tested and soften accordingly.

Wednesday, October 21, 2015

Tips to Help the Dishwasher Run Better (part 1)

If you're lucky enough to have some mechanical help with your dishes, how's your helper doing these days? Cooking can be tough on the dishwasher. All those goopy soups, milk-crusted mugs, and baked-on casseroles can overload it; perhaps you're feeling like things aren't running so smoothly or smelling as good as they ought to in there.

Well, we're here to help, with 5 tips for making your dishwasher run its best.

Are these tips familiar to you? I was already doing several of them, but a few were new, so I thought they might be to you as well.


1. Don't confuse scraping with washing

No one wants to wash their dishes before they wash their dishes; it's just silly. But you wouldn't want to eat a Thanksgiving dinner and then go run a marathon right after. Well, neither does your dishwasher. Scrape food bits off before loading up to help reduce particles stuck on dishes once the cycle is over.


2. Don't overcrowd the dishwasher

It's something that's easier said than done. It's quite tempting to layer in one more bowl or plate to avoid hand washing. Just remember, it's better to wash a few pieces by hand than it is to rerun an entire load because things were too tightly packed.


3. Run hot water before starting the dishwasher

Before starting the cycle, turn on the faucet and run until the water is hot to the touch. This means your first dishwasher fill cycle will be hot, instead of cold, until it finally makes its way over from the hot water heater. This is an especially important tip in winter time, as it takes longer for the water to heat up.


4. Use the correct cycle

It can be tempting to use a shorter, lighter setting to save on time and water bills, but make sure you're washing all your super dirty dishes by hand if that's the case. Just like doing your laundry, keep soil levels together when washing to end up with the best performance.


5. Don't double up on rinse aid

When looking to purchase a new soap for your dishwasher, make note if it includes a rinse aid. If it does, then there's no need to add any extra. If it doesn't, skip the extra purchase and just fill the reservoir with white vinegar. It'll do the trick every time!

Monday, October 19, 2015

How to Clean and Maintain a Dishwasher (part 2)

Inspect the bottom of your dishwasher around the drain. There will be a grate or grill around it, under the arm. This is where wastewater goes. Look for debris clogging up this area. Remove any solid matter that builds up, especially bits of paper, shards of broken dishes, gravel, etc. If you think stuff has gotten down inside, you'll have to do some simple disassembly to get at it.

1. To remove accumulated debris, unplug the dishwasher.

Look for a plug under your sink. Make sure to unplug the dishwasher and not the garbage disposal! Follow the cord back to your dishwasher to make sure.

  • If your dishwasher is at all mobile, move it around to see the proper cord move.

2. Carefully remove the screws at the bottom.


Take care not to drop them! The cover of the filter will lift off, leaving the area exposed.
  • As you disassemble this section, take care to notice what you take off and where. Take photos along the way and set the pieces someplace safe, in the order they came off. When you start reassembly, there will be no question of what you should do.

    3. Place a piece of tape on the opening of the filter.

      This is to prevent debris from getting in it as you clean it. You want the debris out of the dishwasher completely -- not clogging up the pipes even further.


      4. Use a cloth to remove solid debris and then scrub down the base as necessary.

      Be careful of handling broken glass if that is part of what you find here. Rubber gloves are a good idea, too.
      • Use a brush or a cloth to loosen and remove deposits. For dishwashers that have not been properly cleaned recently, you'll need a strong cleaning agent to get at the years of buildup.

      5. Screw everything back together and plug it back in.

        It'll be easiest to do the reverse of what you did to get it apart. Don't over-tighten the screws, especially if they are going into soft plastic.
        • You may want to give it a quick run to see if everything works like it should.

        Wednesday, October 14, 2015

        3 Reasons To Run Your Dishwasher At Night

        Dishwashers are a love hate relationship for some and straight up mandatory for busy households on the go. What time do you run yours? Here's a few tips on why starting it before bed is the most beneficial for your family!

        Even though many don't own a dishwasher, others do and there's a bit of know how that goes along with it. They're an appliance like everything else, but the times in which we run it can impact our home, bills and peace and quiet. Here's a few things to keep in mind:


        1. Humidity versus Air Conditioner:

        Your dishwasher adds humidity back into your kitchen air and even though it's much needed to get the dishes dry, it means your air conditioner has to work a little bit harder. Even though some might live where air conditioning isn't needed, it's still pushing triple digits in many places. At night, when your house is more calm, that need won't be as great.


        2. Sound Reduction

        Although some have new quiet dishwashers, many of us have older units that hum, buzz or just make what could be considered the loudest white noise you've ever heard. Although it doesn't make you go crazy, it will make you turn the tv up or talk louder in your own home. Run it at night and let that noise soothe you to sleep instead!


        3. Avoid Higher Energy Costs

        After lunch and dinner is when many cities are using the highest amounts of energy and thus, the charges for such use is higher. If you can delay your dishwasher, set it to go off after midnight, helping your pocket book by a few pennies. It all adds up at the end of the month!

        Monday, October 12, 2015

        How to Clean and Maintain a Dishwasher (part 1)

        1. Fill the sink half full of water and add 2 cups of vinegar.

        This is going to be where your dishwasher bits are soaking while you clean up around the walls and base. If you don't have vinegar, consider the following:

        • Lemonade drink mix or lemon-flavored Kool-Aid mix. (Don't use strong colors that might stain. There is no need to add the sugar.)
        • Lemon juice
        • A dishwasher cleaning product

        2. Remove the holders and racks

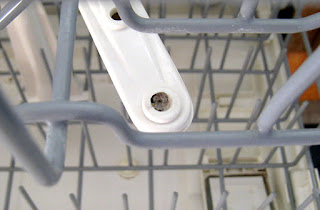
        The two "shelves" of the dishwasher should be removed, along with the utensil holder and any other pieces that aren't a part of the racks. If they're small, place them into your vinegar-water sink for cleaning. If they don't fit, wipe them down with a rag damp with the same vinegar solution.
        • Check for food bits! If any are stuck on, use a toothpick or similar small, sharp tool to pry away at what's been caked on.

        3. Clear any debris out of the holes in spinning arms.

        Look to make sure all the holes are open so that water can run through them freely. If you have this problem, those holes will need to cleaned in order for your dishwasher to run efficiently. Use fine pointed or needle-nose pliers if you have some; otherwise, try a toothpick or something similar. Take care not to scratch anything if you're using a tool with a metal point. Remember to take your time and be careful.
        • If these holes are very small, bend a fine wire with a tiny hook on one end. Thread the wire through the opening most distal from the center of the arm. Each time you do this a small amount of debris will come out.
        • Another option is to drill a much larger hole at the end of the arm. Run the washer to eject the matter, then plug the bigger hole with a stainless steel screw.

        4. Wipe around the edges of the door and around the gasket

        This space doesn't get washed during the dishwasher cycle. Use a damp cloth and the vinegar solution (or, if you like, a bit of mild spray cleaner). An old toothbrush or other soft, household brush can help get into corners and up under the gasket, too.
        • Don't forget under the bottom of the door! In some dishwashers, this is a dead spot where water doesn't go, so it can accumulate debris. Wipe this off with your vinegar rag. If anything is caked on, bust out your scrub brush as necessary.

        5. Remove mildew or mold with bleach

        Run a separate cycle from any acid cleaners you have used and never mix bleach with other cleaners or with dishwasher detergent. Bleach is a very strong chemical, both on you and on your dishwasher, so use it sparingly and only when necessary.
        • If mold and mildew is a problem, leave the dishwasher loosely open for a while after each cycle to allow it to dry out.
        • Avoid using bleach and detergents containing bleach if your dishwasher has a stainless steel interior or door.


        6. Tackle rust stains

        If your water has a lot of iron or rust in it, rust may be beyond your control. If possible, address the problem at its source. If the problem isn't rusty pipes, water softeners can remove a limited amount of iron from water but they mostly work by exchanging minerals that are hard to clean off surfaces for salts that are relatively easy to clean. Filters do exist to remove iron from water and might be worth looking into if your water is extremely high in iron.
        • Use a dishwasher-safe rust remover for the stains themselves, but seek out a professional to ask how they got there in the first place.
        • If the finish is chipping or flaking off the wire baskets in your dishwasher, try a paint-on sealant made just for dishwasher racks. Pull out the racks and check the bottoms, too. If the damage is severe or widespread (not just a few tines but all of them), see if you can replace the entire rack. Online stores sell a wide variety of appliance parts, so your replacement part may be very easy to find.

        7. Replace all parts back into your dishwasher.

          Once the grate, filter, arms, and all the insides have been given their thorough cleaning and the smaller parts have had a chance to soak, place them back in as normal. Or proceed to the next section -- if your dishwasher is really bad, you can take apart the bottom and really get down to business.

          Wednesday, October 7, 2015

          Easy Fridge Trick That Saves You a Ton on Your Grocery Bills

          It’s a statistic that can’t be repeated often enough: Americans end up throwing away nearly half of our food, translating to $165 billion in groceries and farmers market haul at the bottom of the garbage can. That food waste is also the largest component of solid waste in U.S. municipal dumps.

          Shopping habits can impact this rampant waste, but there’s plenty you can do once you bring your groceries home too. Remember how promising those wild blueberries looked, and your grand plans for that organic chicken? You don’t want them to go bad on you. Reorganizing the fridge in the most effective way possible could mean fewer tossed containers of Greek yogurt, which means saved money (and better breakfasts).
          Here’s how restaurants do it: Place food in the fridge based on how thoroughly it needs to be cooked before it’s consumed. Foods that require no cooking can go on the top shelves, where it’s warmest. Then work your way down, with foods that need to be cooked to the highest temperature at the cold bottom (we’re looking at you, free-range bird).

          It couldn’t hurt to keep a thermometer in your fridge to maintain an ideal temperature of about 37 degrees F, and to make sure the mercury doesn’t climb above 40 degrees F, at which point bacteria can grow like crazy. Space items out, too, so the cold air can circulate and do its job of keeping food fresh and ready for feasting.

          Now, on to the specifics, area by area:

          Door

          This is the warmest part of the fridge, where the temperature can be a degree or two balmier than the main compartment, so it’s not a good home for anything highly perishable. (Ignore those adorable little egg cups, for starters.) Use the door’s shelves for the collection of condiments you’ve amassed while perfecting your pad thai and tikka masala. Pasteurized orange juice can go here too. Butter doesn’t need to be kept super-cold and can go right where your fridge wants you to put it—in the covered dairy compartment. (You can also keep soft cheeses, such as brie, in there.)

          Top Shelf

          This is the second-warmest area of the fridge. Put soft drinks, yogurt, leftovers, and anything ready-to-eat—such as deli meats and cheese—up here.

          Cheese Drawer

          If you have one, this can be the designated home for your aged Gouda, where it’s relatively warm. (Cheese, incidentally, can find many happy homes in the fridge. You can also keep it in the drawers at the bottom, if you tend to eat more Great Hill Blue than broccoli.)

          Middle Shelf
          Things are starting to get colder. Because we Americans need to refrigerate our eggs, this is where they should go, where the temperature is most consistent. The milk also goes here.

          Bottom Shelf

          Keep raw meat and seafood here, in their original packaging, and toward the back, where it’s coldest. If you buy a lot of meat and are concerned about drippy raw chicken juices contaminating fruits and vegetables in the drawers below (a valid worry), keep a separate plastic bin on this shelf devoted to uncooked meat. Bonus: easier cleanup if things do get messy.

          Drawers

          Here’s where things get a little bit complicated. Fruits and vegetables belong here, where refrigerator humidity levels are highest. But different produce requires different levels of moisture, and certain fruits emit ethylene, a gas that accelerates rotting in vegetables.

          Your best bet is to make like the Offspring and keep ’em separated. Keep fruit in the lowest-humidity drawer, often marked “Crisper,” with the vent open, which allows more air to come in. Vegetables can tolerate more humidity. Keep the vent on this drawer closed, which keeps air from circulating and holds moisture in.

          Monday, October 5, 2015

          5 things to check on your appliances (part 2)

          6. Fix rusty dish rack tines
          Rust on the tines of your dishwasher racks can adhere to and ruin your dishes and silverware. To solve this issue, purchase a tine repair kit, and use a sealant to adhere the replacement tips over any rusty or chipped tines. Let dry for at least 24 hours before running the dishwasher.

          7. Clean and deodorize your garbage disposalTurn the disposal off and look down the drain for any large, stuck items. Use tongs or another tool--not your hands--to remove blockages. Pour a mixture of ice cubes and salt, or vinegar down the drain. Run cold water over it for 10 seconds, and turn on the unit. To remove odors, place a handful of citrus peels in the disposal, run cold water, and turn it on.

          8. Clean your dryer exhaust
          Lint in the dryer exhaust not only reduces appliance efficiency, it is a fire hazard. To clean, loosen the clamp and pull the exhaust off the back of the dryer. Remove large clumps of lint from the tubing and the hole in the back with your hands, or if you can't reach, gently scrape with a straightened coat hanger. Vacuum and reattach.

          9. Inspect washing machine hoses
          Most washing machine floods are caused by leaks in the hose. Check the hoses that connect to the back panel on your washing machine for any cracks, leaks, or weak spots on the hoses. If you find any deformities, replace the hose. And at minimum, replace the hoses every five years.

          10. Clean your air conditioner filter
          Clogged or dirty filters restrict air flow, reducing energy efficiency as well as the appliance's lifespan. As a result, filters should be cleaned every two to four weeks. To clean the filter, remove the front panel of the unit. If a reusable filter is in place, vacuum it to remove as much dirt as possible. Disposable filters can simply be replaced